How to blog with Jekyll (on Windows) - Part 1
So, here it is. My “How to” on creating your very own Jekyll blog. Now, this is for Windows so if you are on OSX or Linux there are official tutorials from Jekyll (and come, if you’re on Linux you should know how to do this stuff ;p).
Prerequisites
Jekyll is built on Ruby - so naturally, Ruby is required. As I have stated before, I know very little Ruby and as I am running Windows, it is not pre-installed. I went through various methods of installing Ruby and acquiring all the necessary Gems, but to no avail.
Fortunately for me, Madhur Ahuja clearly knew the pain I was suffering and created an all-in-one download - PortableJekyll, which contains everything:
- Ruby 2.0
- Ruby DevKit
- All the required Ruby Gems
- Python 2.7.5
- Git 1.8.3
Now the last two I had already, but to have all the Ruby stuff, setup and in one place is just awesome! To download PortableJekyll click here (it takes you to his dropbox).
Installation
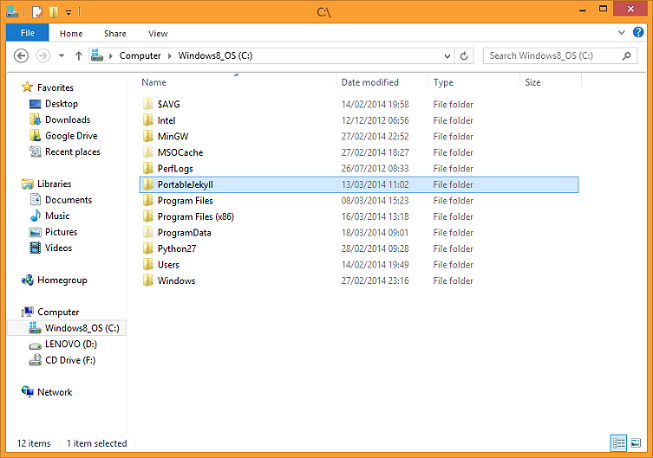
Once that zipped folder has downloaded, extract the contents using your favourite file archiver *cough* 7-zip *cough*. Now drag the extracted file to the C:\ drive and place it there. Done. I told you it was awesome!
Once the folder is in place, you need to add a few lines to the PC’s Environment Variables - specifically adding the paths of Jekyll, Ruby, the devkit and Python. Once the paths have been added, you can call and use these programs anywhere on your system.
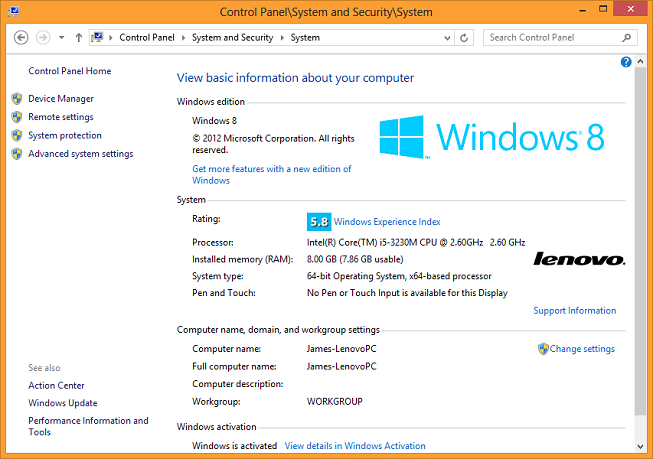
Go Start -> Control Panel -> System and Security -> System. You should now see system specs and other info on your machine.
On the left hand pane, click “Advanced System Settings”, which will bring up the following screen.
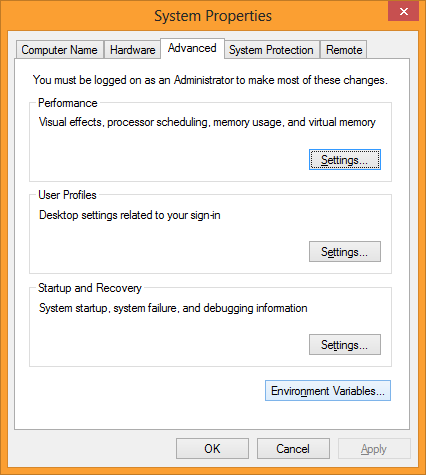
Now click on the “Environment Variables”.
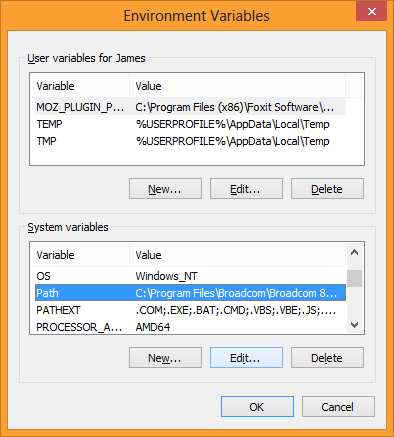
Then scroll down until you can select the system variable “Path”. Select “Path” and click edit - opening the following screen.
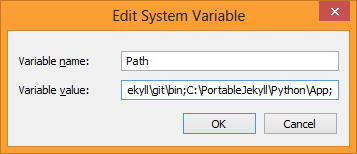
Now enter the following while leaving the rest of the path unchanged:
C:\PortableJekyll\ruby\bin;C:\PortableJekyll\devkit\bin;C:\PortableJekyll\git\bin;C:\PortableJekyll\Python\App;
Now, if you chose to put the PortableJekyll folder in another drive like D:\, then just change the C to a D!
Once entered click OK, OK and OK.
Open up a CMD or Powershell and enter
jekyll
It should then print out the Jekyll help screen, listing all the commands available.
Done
That’s it, you now have Jekyll and all its dependencies installed and ready to go. I will be following this up with the second part, going over actual creation of a static blog, theme installation and customisation as well as deployment.